Sharp PN-L603A Quick Start Guide
Browse online or download Quick Start Guide for Interactive whiteboards Sharp PN-L603A. Sharp PN-L603A Quick Guide User Manual
- Page / 6
- Table of contents
- BOOKMARKS
Summary of Contents
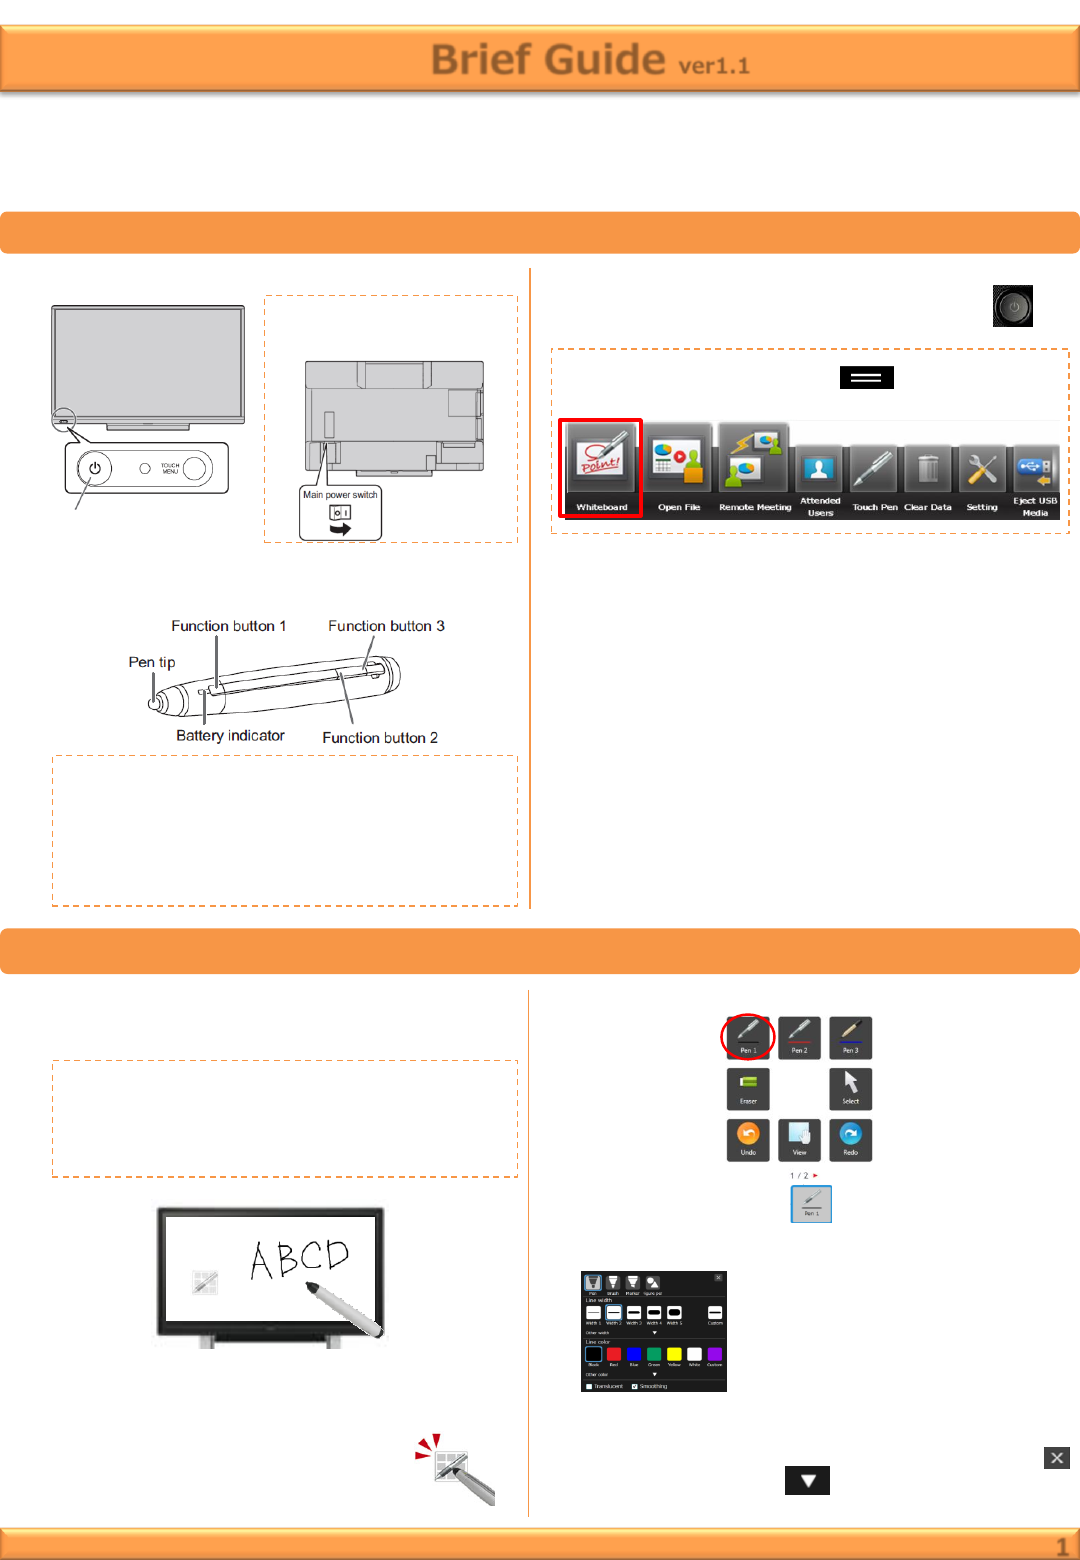
3. Launch “Whiteboard”. At previous #1 if you press the POWER button , “Whiteboard” is launched automatically. PN-L703A/L603A
Erase character 2 ・Touch “Eraser” icon on “Square menu”, and then you can erase by touching (like moving softly) the area which you w
Save the data 1. Insert USB flash drive. 2. Touch “Save” icon on “Square menu”. 3. Select the save method. ・Save as a new file:
Eject a USB flash drive 1. Touch “Eject USB Media” from launcher menu. 4 2. Select a USB flash drive. Select a USB flash drive which you want
Other function 5 ●Quick start ・This display have quick start function which you can start within around 5 seconds from pressing the POWER button.
Other function 6 DX-C401 MX-C300P MX-2610N MX-4141N MX-B402P MX-M465N DX-C401 J MX-C300PE MX-2614N MX-5110N MX-M264N MX-M503N DX-C400 MX-C300PL MX-264
© 2020, manymanuals.com. All rights reserved. | 0.844 s |
 Manymanuals.com
 Manymanuals.de
 Manymanuals.fr
 Manymanuals.it
 Manymanuals.pl
 Manymanuals.cz
 Manymanuals.es
 Manymanuals-pt.com
Comments to this Manuals